How to Create & Manage Webpages with TinyMCE
Wednesday July 17, 2019
Not a cyber-coder? Most of us aren't! Which is why we give you the option to create your own highly customizable, professional website, landing pages, and blogs, with easy tools and easy to understand formating!
When you're creating a blog for your website, you don't need an editor with a lot of template or widget options. You just want one that's easy to use, where you can format text quickly and easily, add some pictures, and be done.
The opposite is true when you're creating a webpage or landing page for your website. You want to be able to customize the text, photos, and layout to be specific to your brand and look as professional as possible. You're willing to spend a little more time on it as long as you can get exactly what you want.
The TinyMCE editor lets you create and edit blogs easily and quickly, and offers lots of options for customizing landing pages and other webpages.
Advantages of TinyMCE
- Advanced customization
- Easy blog editing
- Short code options
TinyMCE vs. Drag & Drop
AllProWebTools offers two ways to edit webpages - TinyMCE and Drag & Drop. The Drag & Drop editor is great if you're new to creating webpages and want to create a beautiful webpage quickly without learning a more complicated system. In contrast to the Drag & Drop editor, the TinyMCE editor has an interface that looks more like Microsoft Word or Powerpoint and makes text formatting easy and fast. The TinyMCE editor has more custom options and even though it may take longer to learn the system, you'll be able to create almost anything you want.
Why Choose the TinyMCE Editor?
Customizable Content Blocks
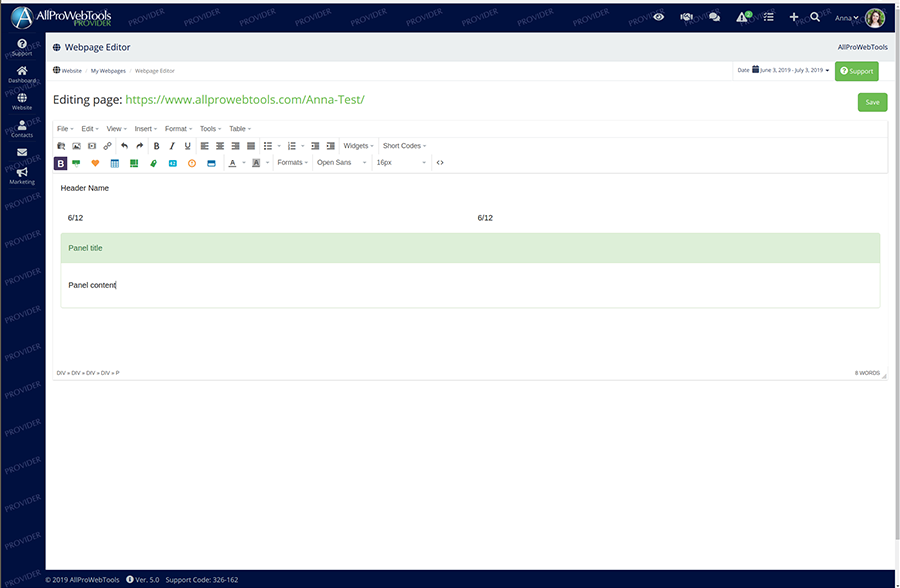
Instead of dragging and dropping pre-made widgets in the Drag & Drop editor, TinyMCE offers blank content blocks that you can customize as needed. You can choose the width of the content block you want to create headers, buttons, blocks for images, and more. You can add your own text, images, videos, and short codes. With text in TinyMCE, you have more options for fonts than you do in Drag & Drop, and you can customize the background color of any block.
Short Codes
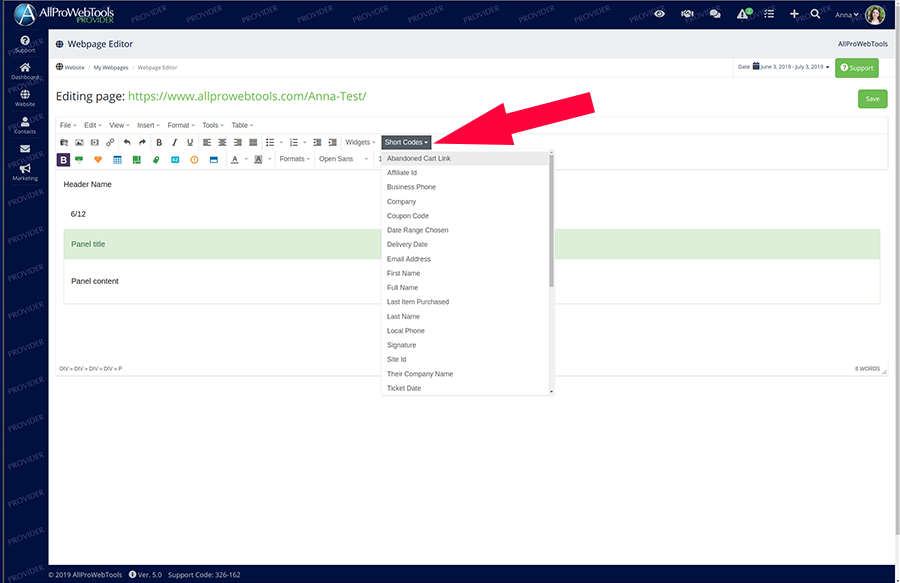
Short codes are pre-made blocks of code that fill in custom content like a customer's name. You can add them quickly into your webpage to add a personal touch and make your landing page or webpage more functional. Some examples of short codes are coupon code, delivery date, and ticket date. You can create the same options in the Drag & Drop editor, but they aren't pre-made. With the TinyMCE editor, it only takes two clicks to add a short code.
To add a short code, just put your cursor in the part of the webpage where you want to add the short code. Click the "Short Code" tab in the menu bar, then select the short code you want to add to the webpage.
Tables & Templates
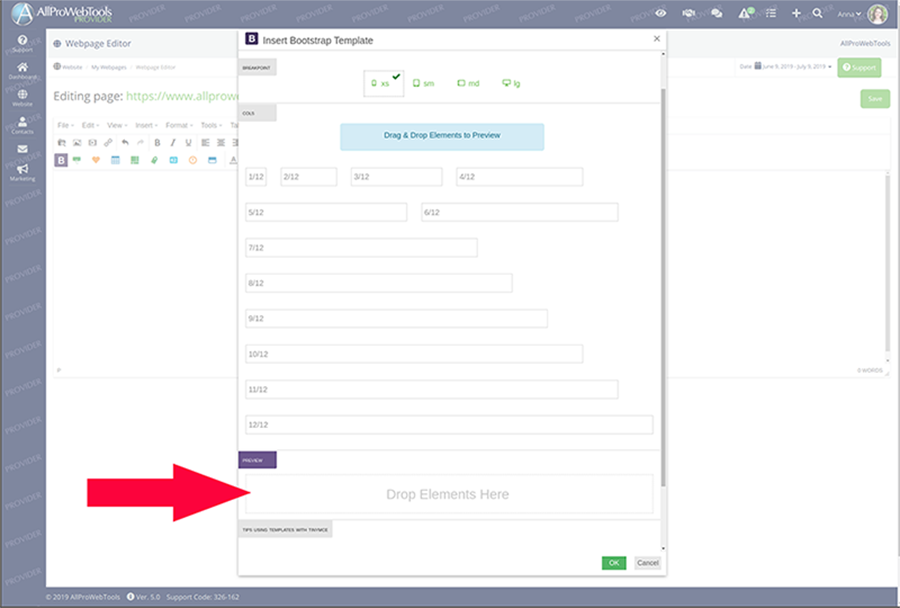
Like the Drag & Drop editor, the TinyMCE editor has template options you can add to webpages. The templates in TinyMCE are pre-formatted with width, but don't contain any other content or code. That way, you can choose which width you want, then easily add code and content to the template.
To add a template, click the green "Insert/Edit Template" icon in the menubar. Then choose the width of the template you want (1/12, 2/12 3/12, etc.) and drag it to the bottom of the box where it says, "Drop Elements Here." Click ok to insert the template.
How to Create A Blog with TinyMCE
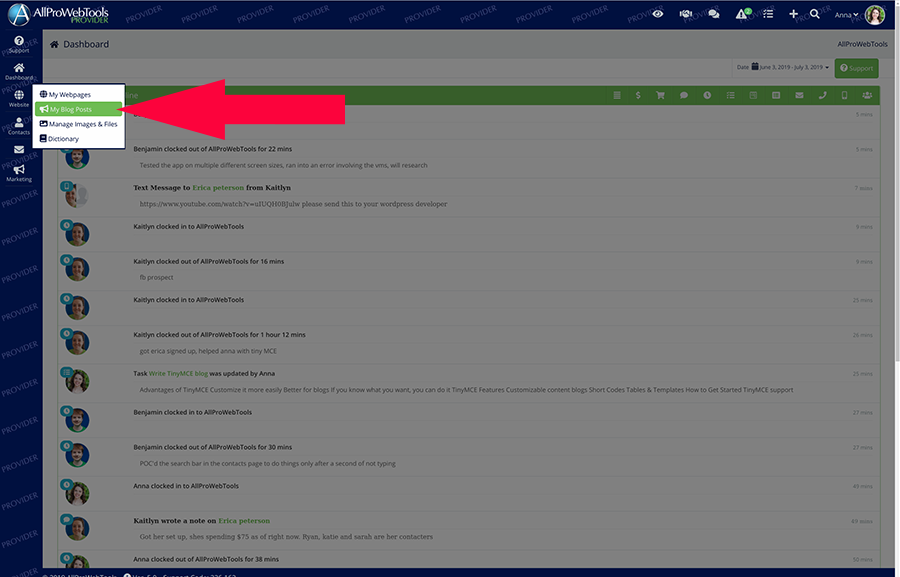
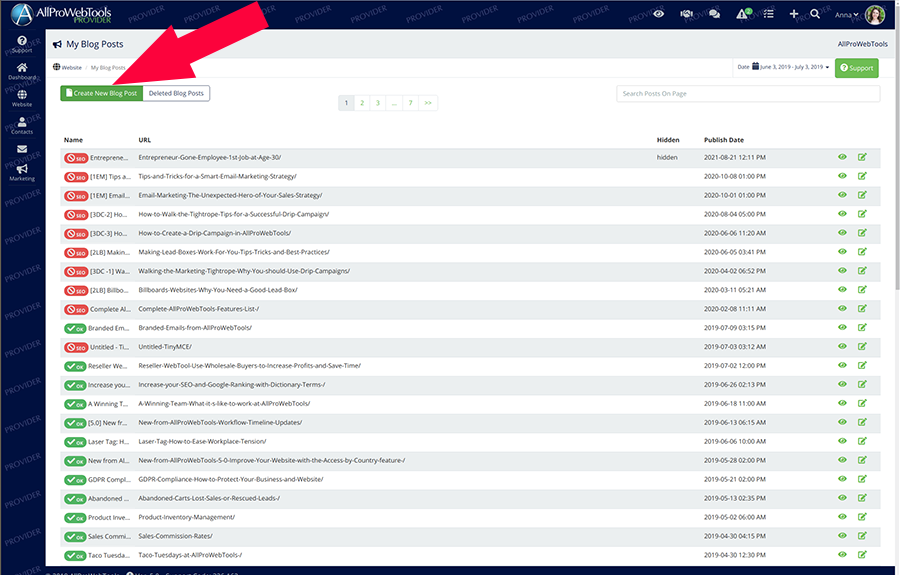
To create a new blog, go to "Website," then click "My Blog Posts."
Click "Create a New Blog Post."
Once you're in the new blog post, enter a page name. Set the date you want the blog to go out under "Settings." Then click "Save."
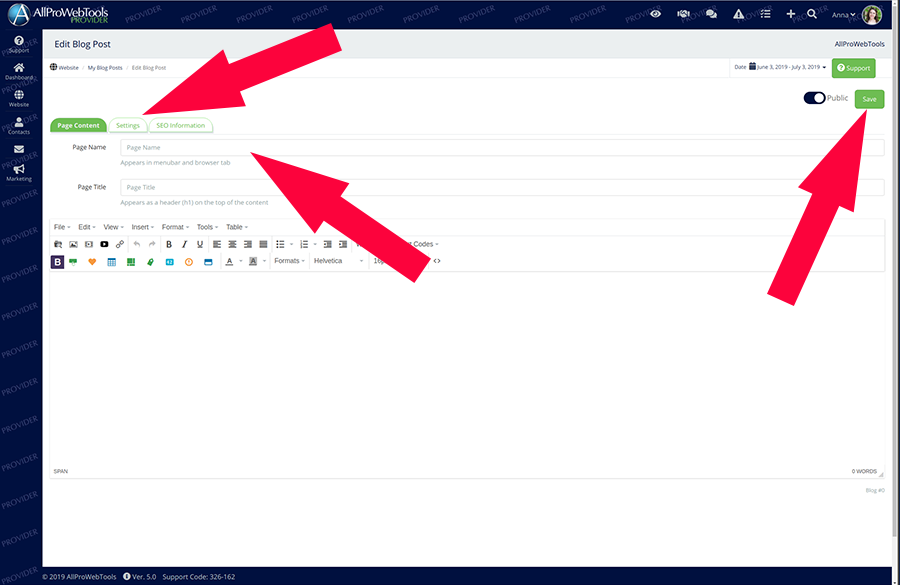
Once your blog post is saved, start adding your blog content, including headers, text, images, links, etc.
How to Create a WebPage with TinyMCE
You have two options for tools to create webpages in your AllProWebTools account - TinyMCE and Drag & Drop.
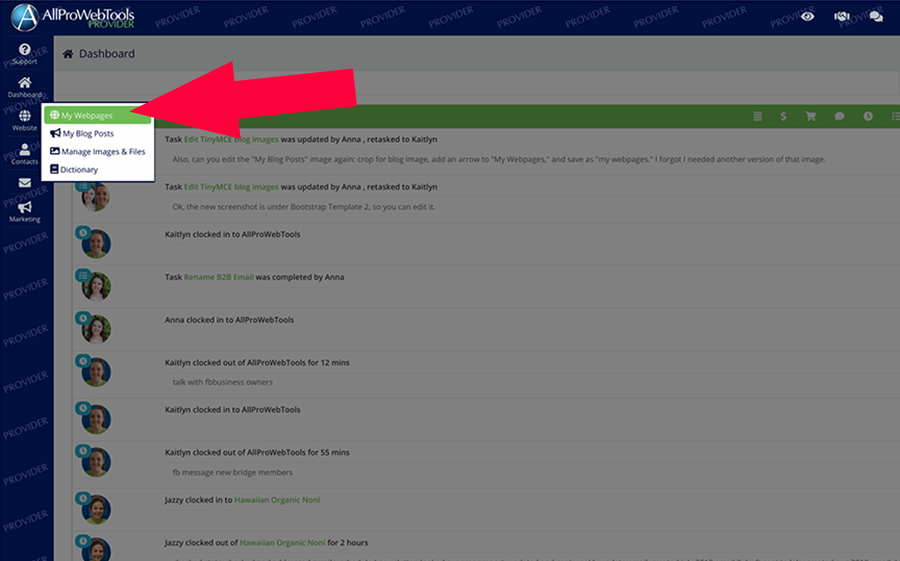
To create a webpage with TinyMCE, go to "Website," then click "My Webpages."
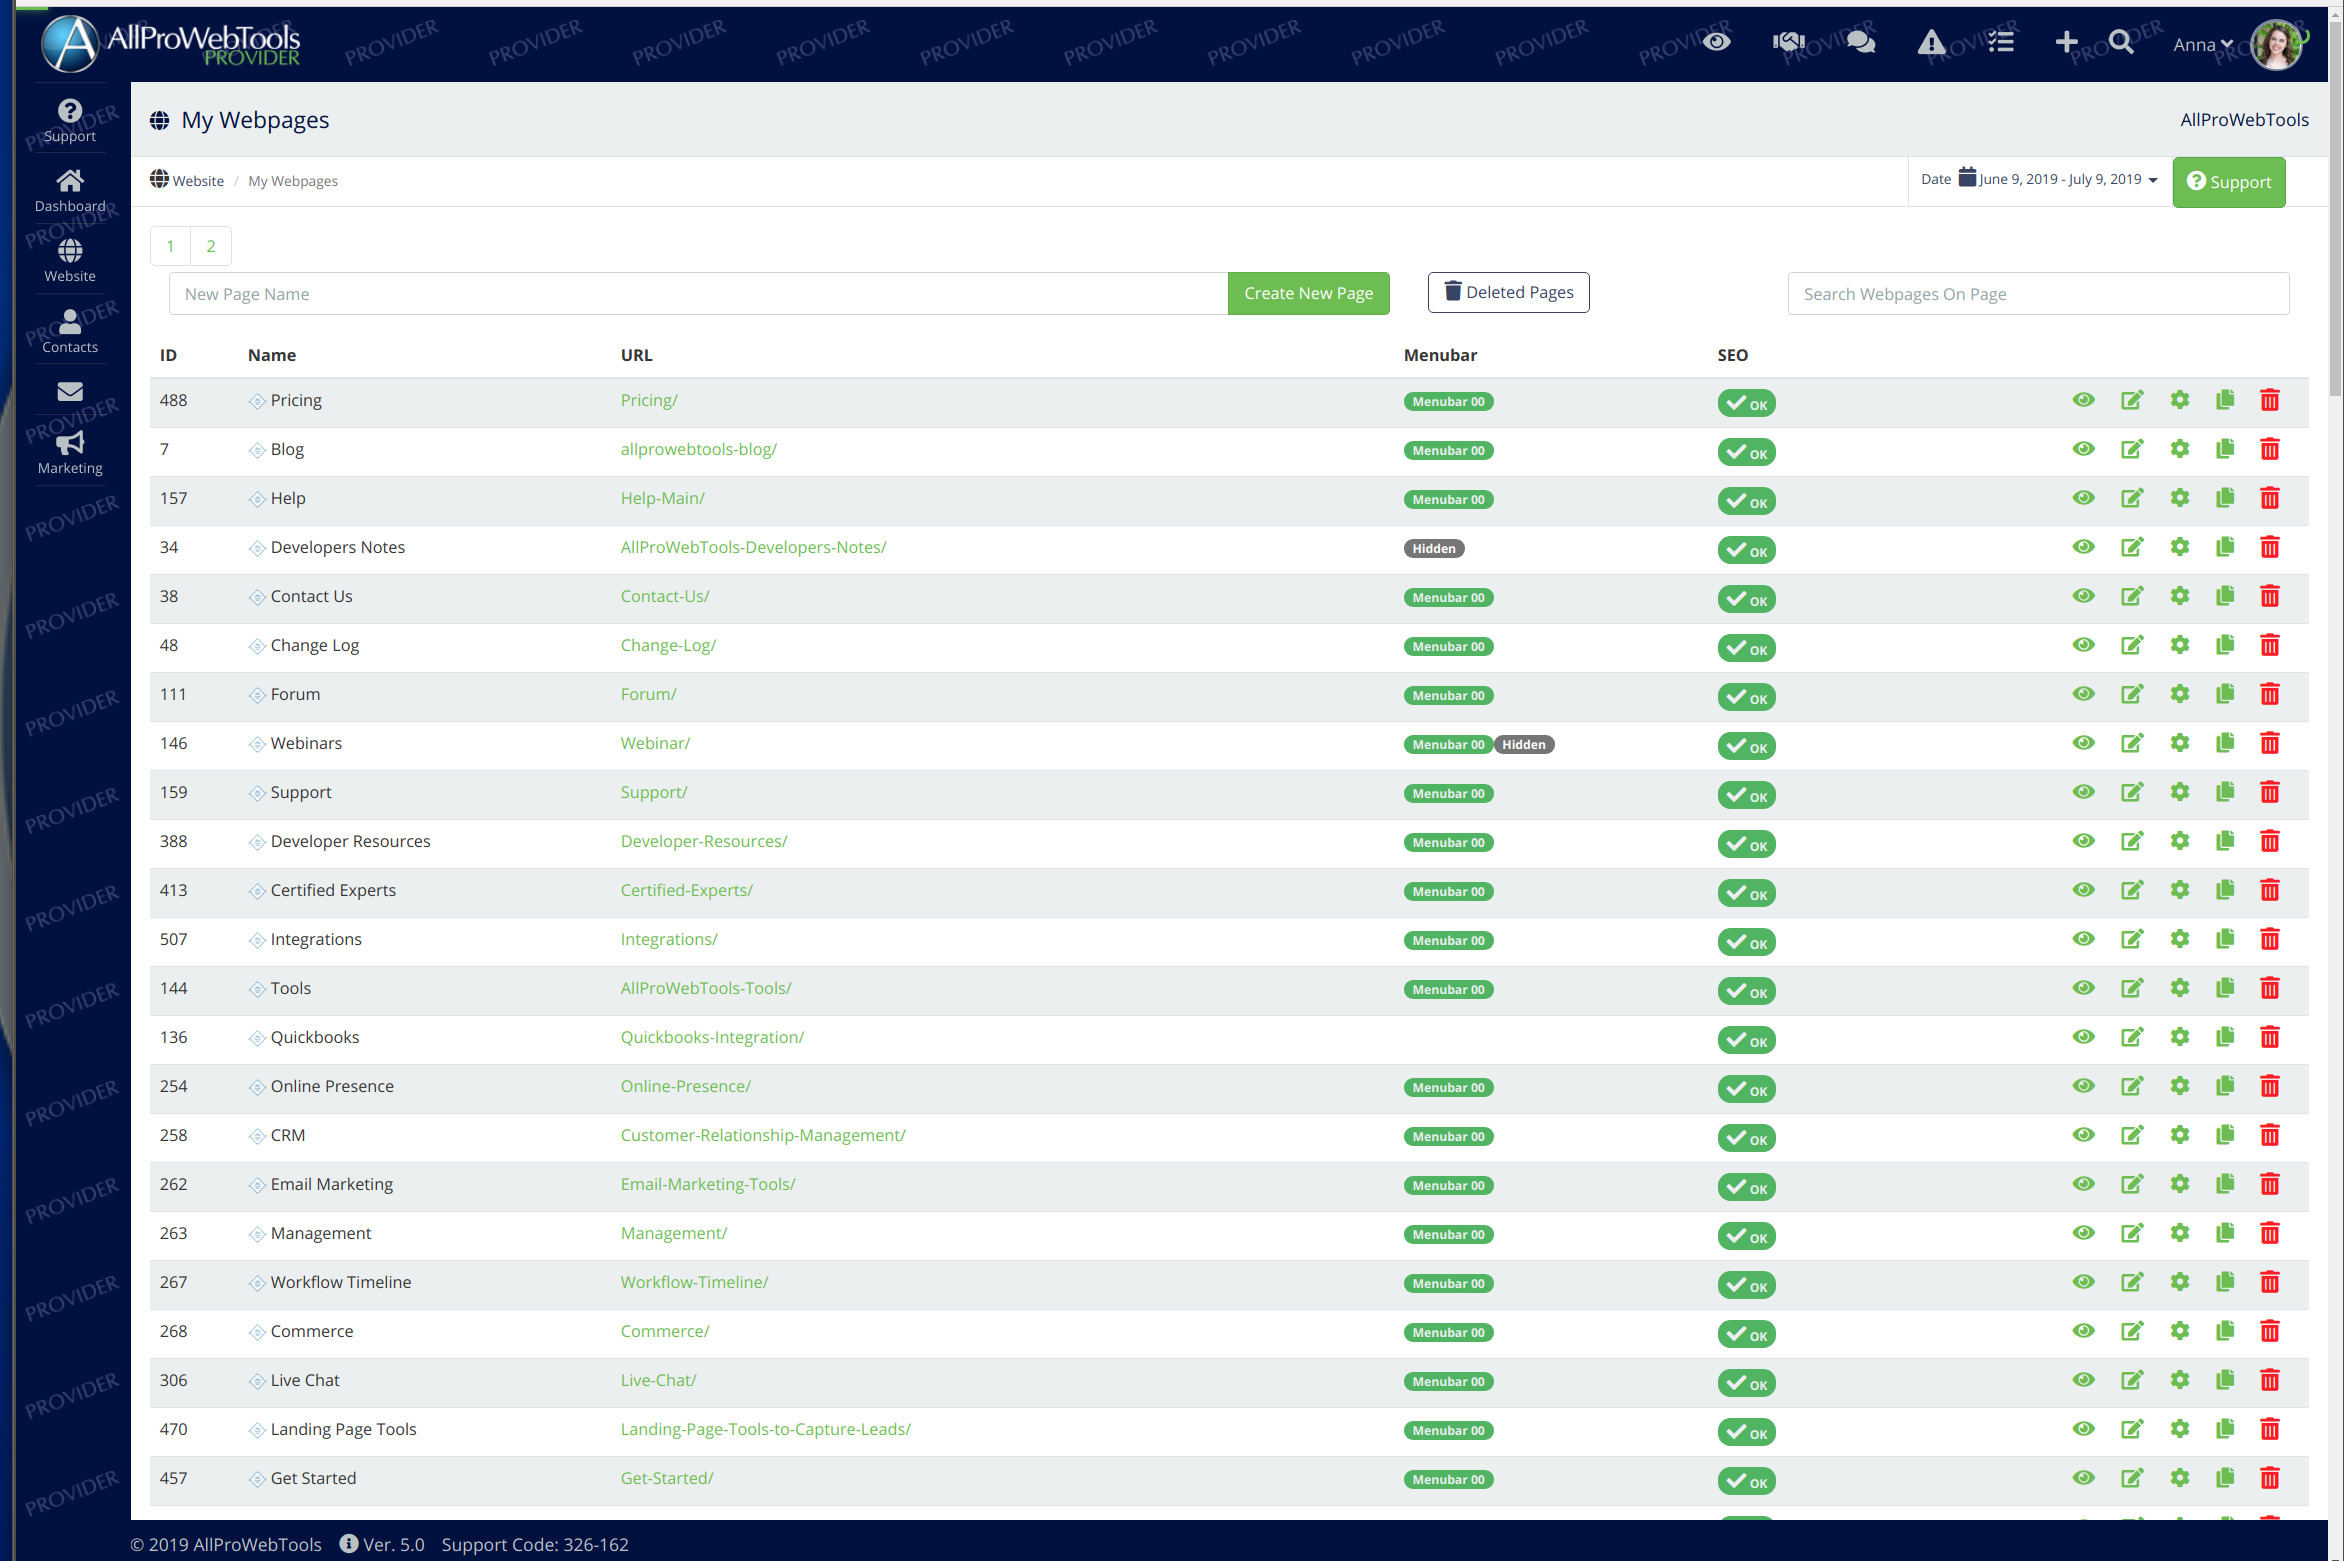
Under the "New Page Name" field at the top of the screen, enter the name of the webpage you're creating. Then click "Create New Page."
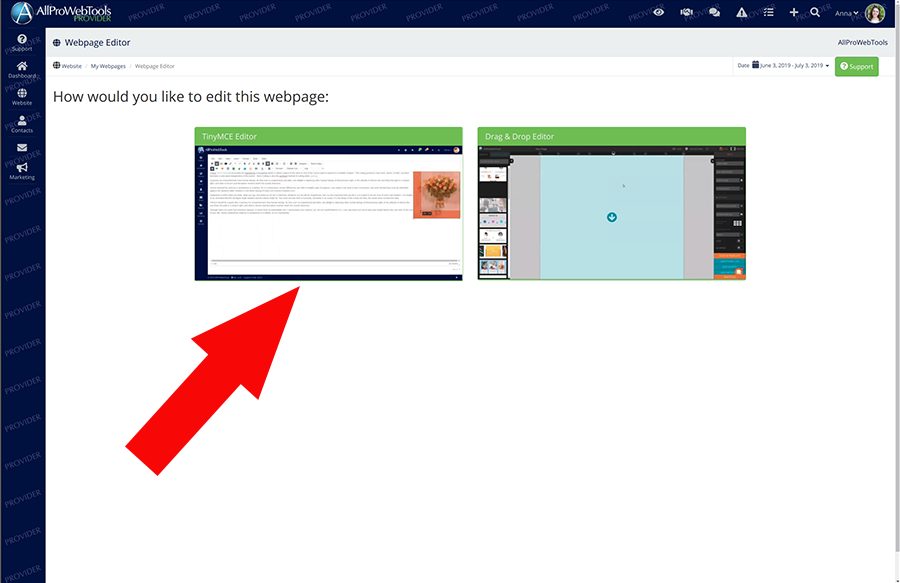
Select "TinyMCE" as the editor you want to use to create the webpage.
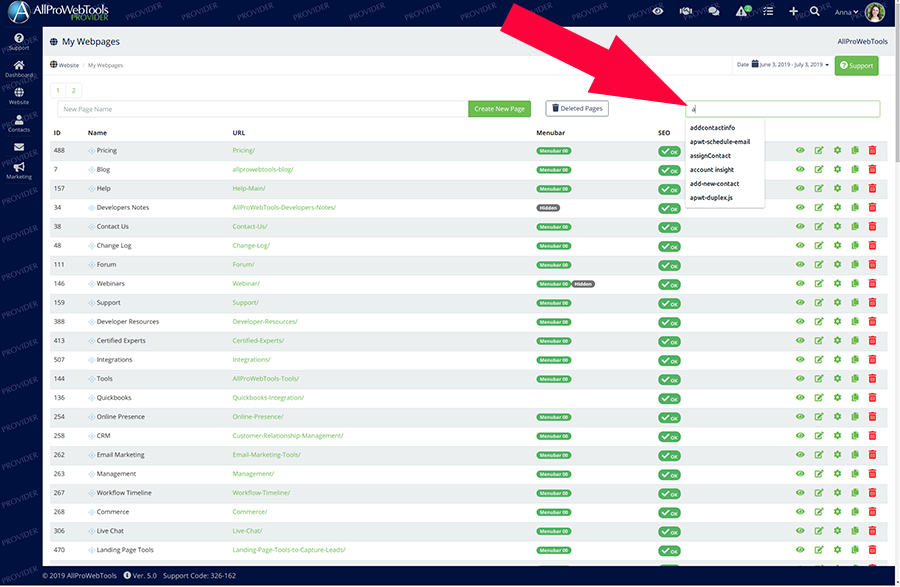
To edit the page settings and SEO, search the name of the webpage in the searchbar at the top right of the page. Then click the gear action button next to the correct webpage on the right side of the page.
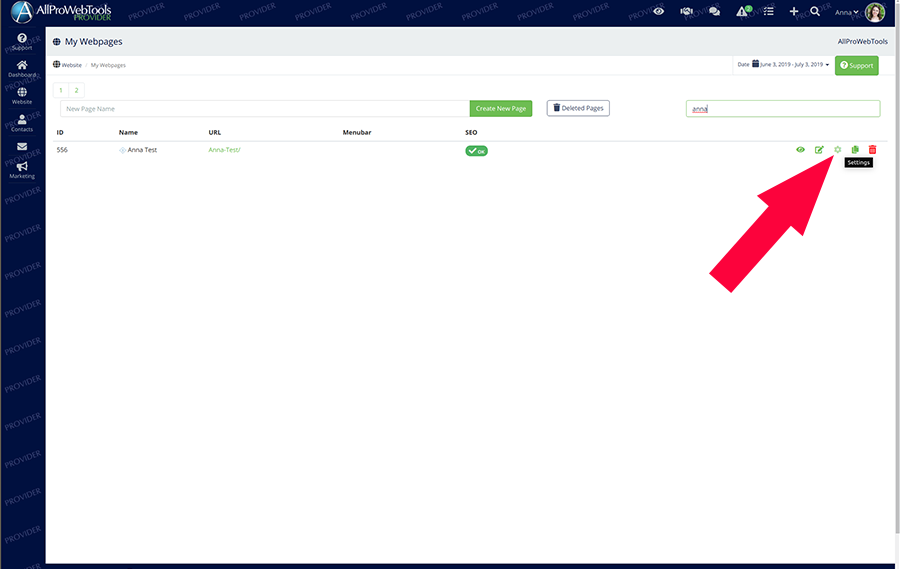
Edit the page settings, navigation, SEO information, and more.
To get more in depth tutorials and support on how to use TinyMCE to create webpages, visit the TinyMCE website.
Get Started with the TinyMCE Editor!
The TinyMCE editor comes with your AllProWebTools account! To get started with AllProWebTools, sign up for our free trial!

