New from AllProWebTools: Social Media Authorship [4.0]
Monday October 5, 2015
Promoting your company blog on social media is one of the most effective ways to spread the word about your business. Hopefully your fans, friends, and employees do all they can to help you out by sharing your content on social media!
And of course, new fans who read and like your content share it as well, until there are many degrees of separation between you, who wrote the content, and the people sharing and reading it.
With all that sharing, it can get complicated trying to track the metrics that matter: how many people are being exposed to your content, and how are they interacting with it?
To help you measure the impact of your content and get credit for what you’ve written, we’ve added social media authorship to AllProWebTools. Learn how to make the most of it!

What is Authorship?
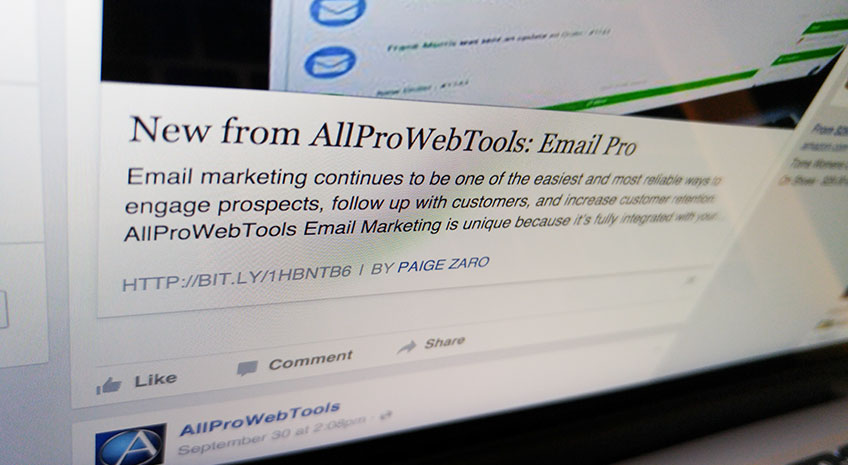
Next time you’re looking through your Facebook or Twitter Feed, take a look at the articles people are sharing. Underneath the picture, the article title, and the description, you’ll usually see the website that the article came from.
Sometimes, you’ll also see the author of the piece, as you can see in the example below. The author can either be the name of a business or the name of the individual who wrote it.
That information all comes up automatically when someone shares an article from a site with authorship. Don’t rely on other people to mention you or tag you—with authorship you always get credit for your articles.
Don’t rely on other people to mention you or tag you—with authorship you always get credit for your articles [Tweet this]
Authorship on Facebook
Whenever you post a link on Facebook, Facebook automatically formats your post to show information about the page you’re clicking to. It usually shows a picture from the page, the title, description, and website domain name. If the site has authorship enabled, Facebook will also show the name of the author.
If that name (whether of a business or an individual) is connected to a Facebook account, it will show up as a link to that profile. When you hover over the link, it will show your profile and cover photo, as well as reviews and your location if you used your business page for authorship.
The hover-over also has calls to action, depending on your Facebook account settings. You might want to give people the chance to Follow or Like your page, or give options to contact or Message you.
Authorship on Twitter
Authorship is a little bit more subtle on Twitter, but it can still help you get much more accurate information about how far your blog posts have spread on Twitter.
Twitter doesn’t show information about the page each post links to in your feed. Unless you post a picture to accompany your post, when you post a link on Twitter, your followers just see the text.
But that information is there if you know where to look. Next to posts with links, you’ll see something that says, “View summary.” If you click on this, you’ll see an image from the site, as well as the title, description, the domain name of the website, and the authorship, if it’s enabled from the site. Twitter calls the summary a “card.” You can learn more about cards, and the different types, by clicking here.
Cards make it much easier to track how your blog posts are spreading on social media. When you go to your Twitter analytics, you’ll be able to look at how your Twitter Cards have performed. That means, Twitter tracks every time your card shows up, whether you shared the post or not, and whether you were mentioned in the post or not.
Benefits of Authorship
If you choose to use authorship through AllProWebTools, we track your articles no matter who shares them on Twitter or Facebook, and make sure that little “By: Your Name” is always there.
Believe it or not, something as small as that can make a big difference in growing your business and your brand!
Get Credit for Your Content
First of all, you most likely publish content from you blog to show that you’re an expert in your industry. You build up goodwill with everyone that gets useful information from the content you write, and that goodwill can eventually lead to sales.
With authorship, even people who don’t click through to your article begin to associate your name (whether you use the name of your business or your own name) with that industry. They start to think of you as the expert that you are!
Get New Followers
AllProWebTools authorship does more than just show your name—you can link it to your social media profiles, so people can follow, Like, or contact you directly from your shared content.
When it's just one click to follow, like, or contact authors, readers are much more likely to engage with your brand, even if they didn’t know much about you before reading your content.
When it's just one click to follow, like, or contact authors, readers are much more likely to engage with your brand [Tweet this]
Improved Analytics

Authorship connects your name with: your author profile on your company blog, your social media accounts, and any independent shares of your content. That means, you can calculate how far your name and messaging is really spreading.
How to Set Up Authorship
Authorship is now included in all AllProWebTools consoles, if you host your website through AllProWebTools. When you use your company blog to publish content about your products, industry, etc, it has always showed the user profile of the author. Now, that profile connects to Facebook and Twitter as well.
Fill Out Your Profile
First, you have to fill out your blogging profile on AllProWebTools, which is connected to your AllProWebTools user.
Remember, you can either use your personal social media accounts, or your business’s accounts.
- Hover over “Settings” on the left toolbar, select “Users” and then choose your name.
- Click “Authorship” from the green submenus.
- Enter in your URL for Facebook (and Google+ if you would like) and your Twitter Handle (either your personal ones or the business ones).
- Make sure the rest of your info is up-to-date, including your profile image and biography.
- Start blogging!
Configure Blog Post
For each blog post you create, you can specify an author from among your business’s users. If you’re the only writer for your blog, you’ll be the only option. If you have multiple authors (which we recommend!) each of them can have their own authorship.
- Hover over “Website” on the left toolbar, select “My Blog Posts,” and then click “Create New Blog Post.”
- Create your blog post as normal, and then add authorship.
- Go to “Settings” and scroll down until you see the field “Author”
- Select the username of whoever you want to be the author of this blog post, making sure that user is configured (as above) to link to the social media profiles you want to feature!
- Check it out on Facebook and Twitter to make sure it looks the way you want it to.
Authorship is an example of something that’s so simple, but which can make a big difference to your business’s growth as a thought leader, growth on social media, and conversion rates from shared content.
Do you currently have authorship set up on your website’s blog?

Paige Schartz
Paige is the Programming Lead at AllProWebTools. She enjoys working with her clients and the daily challenges of keeping up with the fast pace of technology. She is constantly reading and learning about all the latest Internet technologies in an effort to provide her clients with the most up-to-date and relevant changes to this landscape.
Find on Google+Categories
Recent Posts
Popular Tags
expert facebook lead forms cherie allpro provider calendar features lead boxes company culture winArchives
Subscribe
