How to set up SMTP with Sendgrid on AllProWebTools
Thursday January 27, 2022
In this blog, I am going to show you how to set up Sendgrid as your SMTP server so that you can start using your Email Marketing Webtools. Let's jump into it!

You can use Sendgrid as your SMTP server for your AllProWebTools account by following these steps :
1. Log into your Sendgrid account
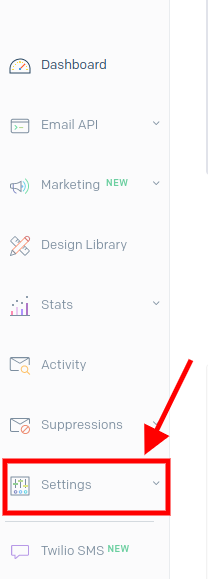
- Log into Sendgrid website. You can go to the "Settings" menu on the left
- Then "API Keys" after that
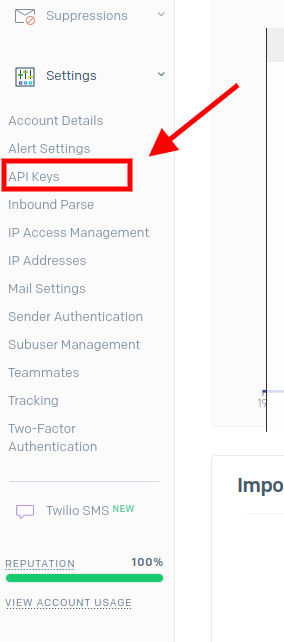
- Next, click on the blue button that says "Create API Key"

2. Create new API Key
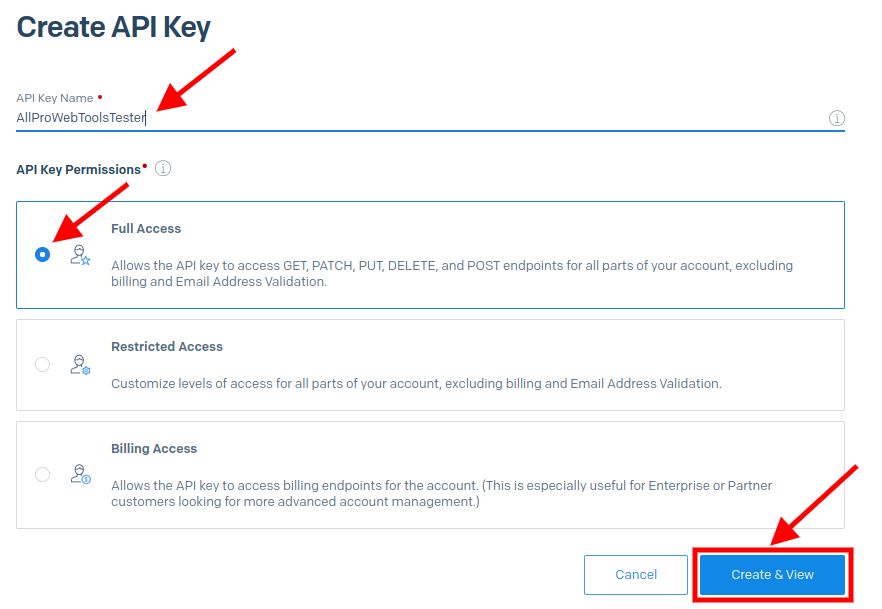
- Name your API Key
- Select the "Full Access" option
- then click on the "Create & View" button
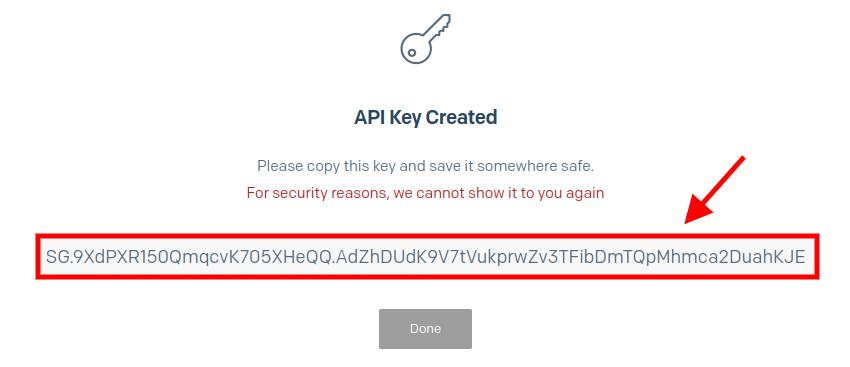
- This will bring up your newly created API Key for you to see, You can click on the API key itself to automatically copy the credential
**Note that for security reasons, Sendgrid will NOT show this to you ever again**
3. Set up SMTP on your AllProWebTools console
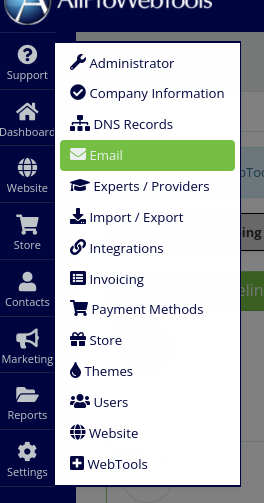
- On your AllProWebTools account, you can go to the "Settings" > "Email"
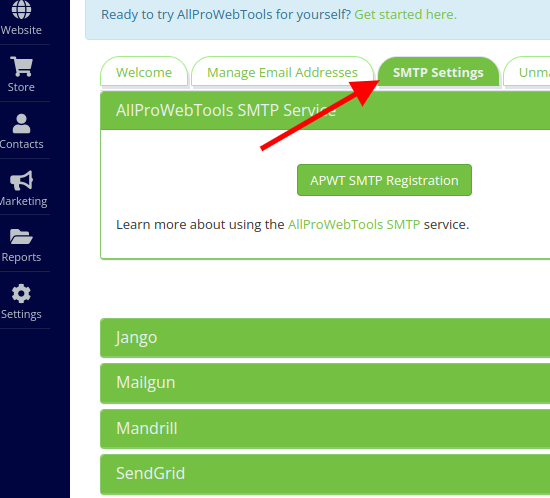
- Click on the "SMTP settings" tab
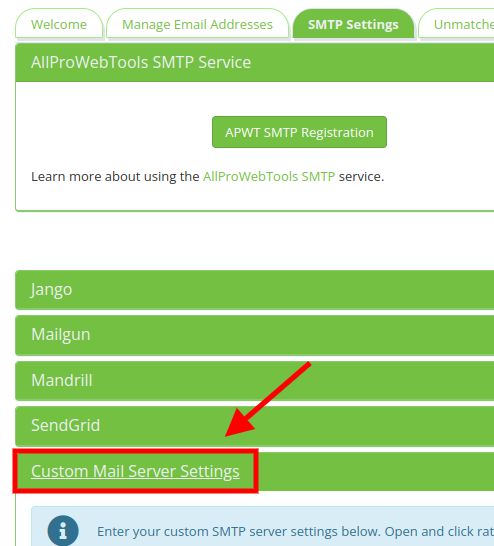
- And then click the "Custom Mail Server Settings" at the bottom of the page
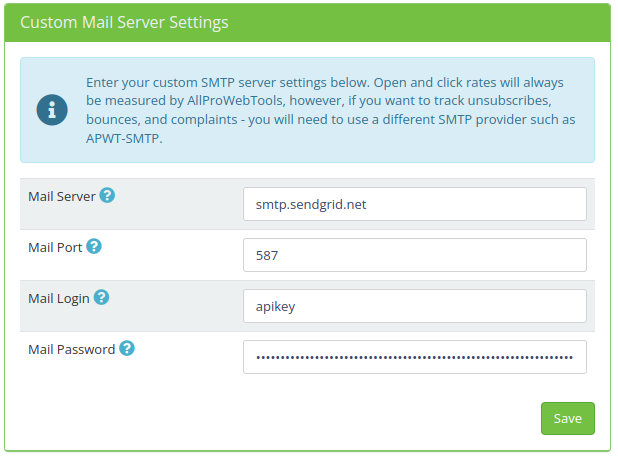
- Here, You can fill in your Mail Server, Mail Port, Mail Login
- Lastly, Paste the Mail Password that you just copied from Sendgrid website and save
4. Add Webhooks
- Go back to the "SMTP Settings" tab
- Click on the green long bar that says "Sendgrid"
- You can click on the gray area that contains a link to copy it
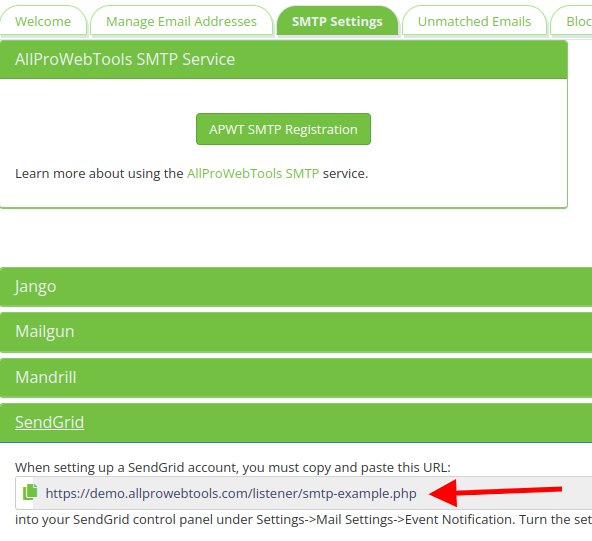
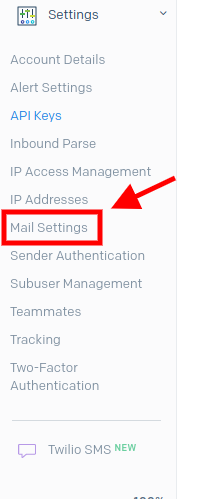
- Now, go back to your Sendgrid account again but this time; "Settings" > "Mail Settings"
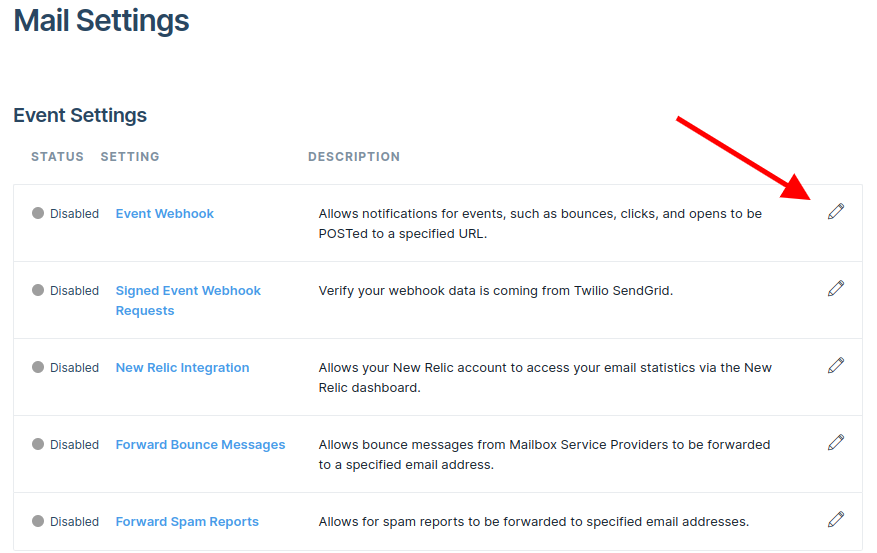
- Click on the pencil icon to configure your event settings
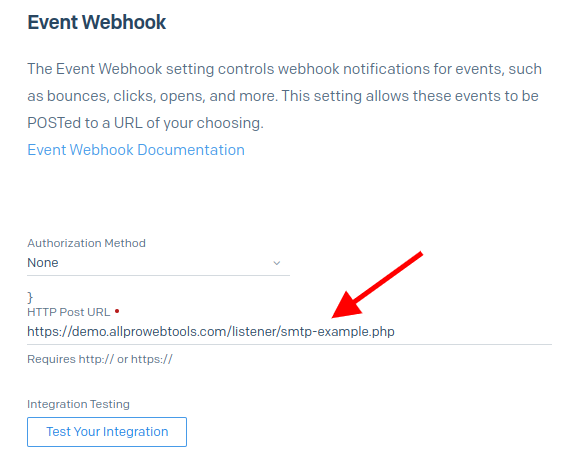
- Paste the URL that you've copied into "HTTP Post URL"
- Check all the following boxes (Dropped, Bounced, Unsubscribed and Spam Reports)
- Toggle the webhook status to "Enable"
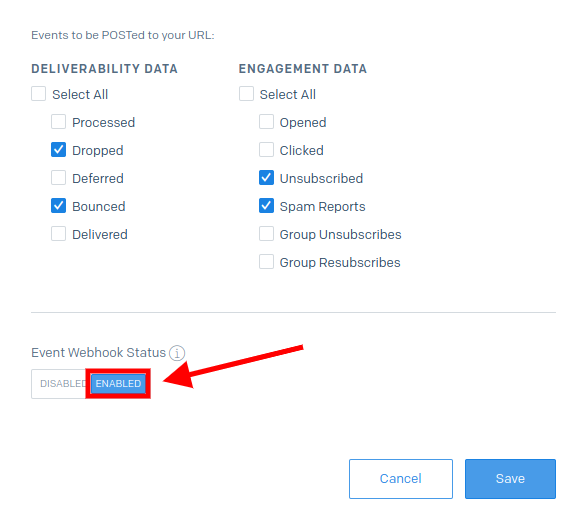
- Click "Save"
5. Authenticate Your Identity
At this step, some may be able to send out emails right away. But for some, you need to authenticate your domain first.
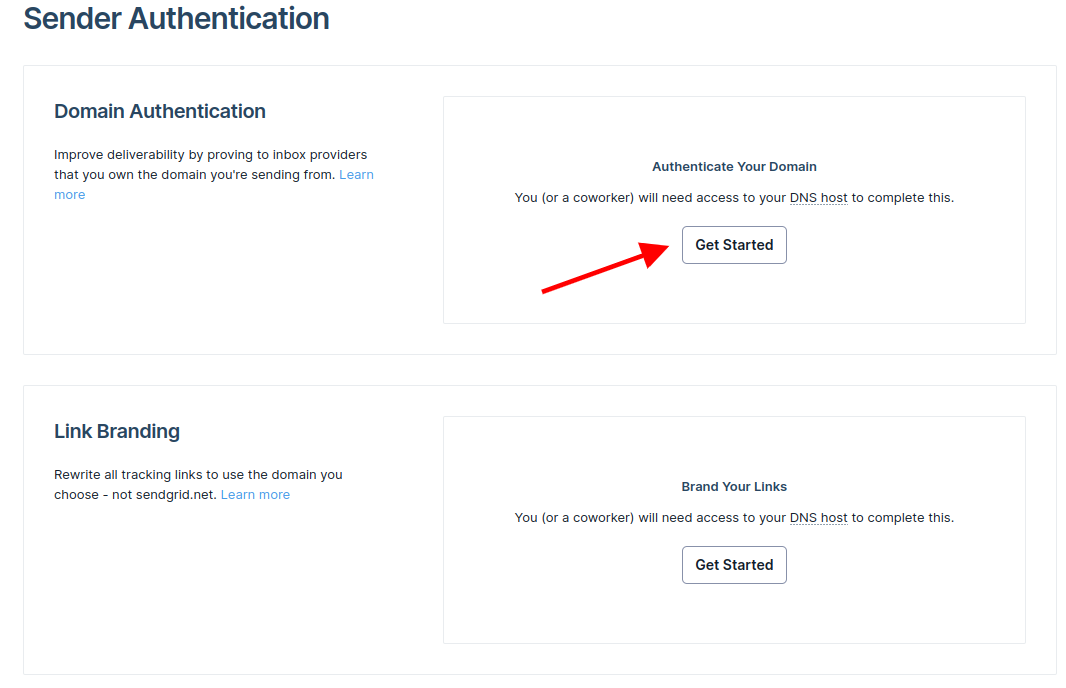
- Click on the "Settings" then "Sender Authentication" menu on the left

- And hit the "Get Started" button to authenticate your domain
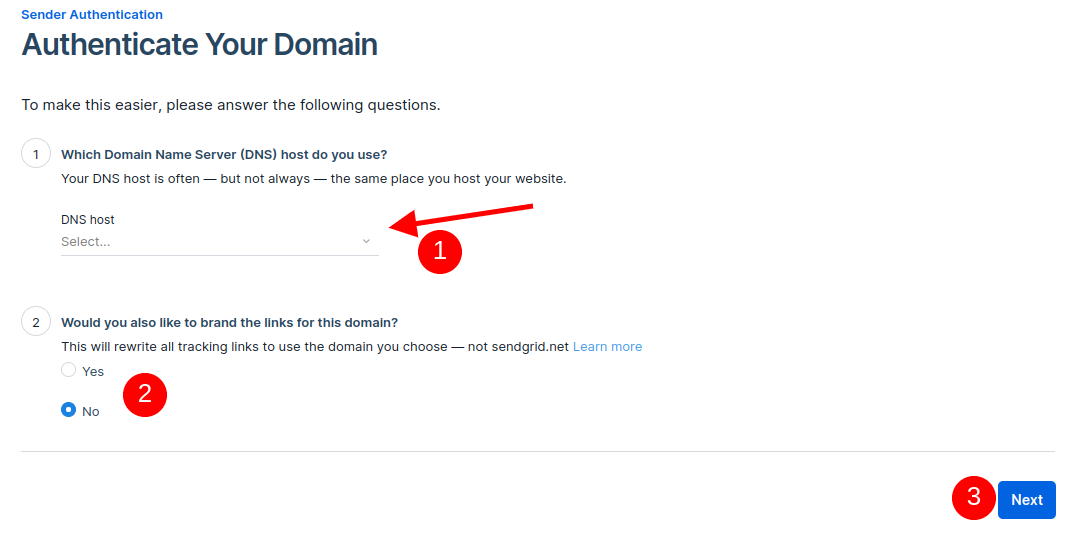
- Select your DNS hosting service company at step 1
- You can ignore the step 2 here if you do not wish to rewrite all the tracking links
- Hit the "Next" button
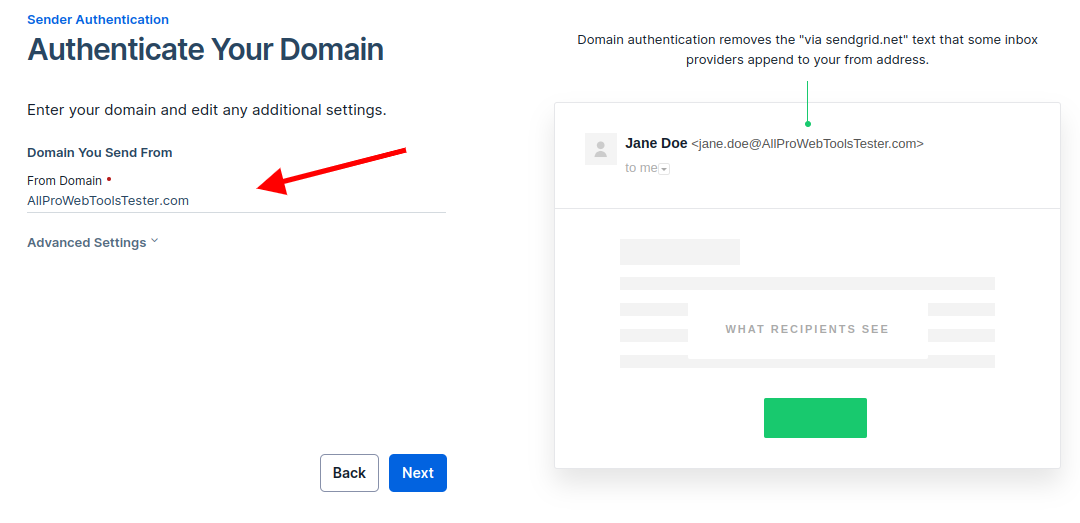
- Type in your domain name and click on the "Next" button again
- Here, You will see the list of your DNS records which you are going to put them into your domain hosting service website (WIX, Godaddy, Cloudflare, Namecheap, etc.)
- You can use this website to find out where your domain being hosted
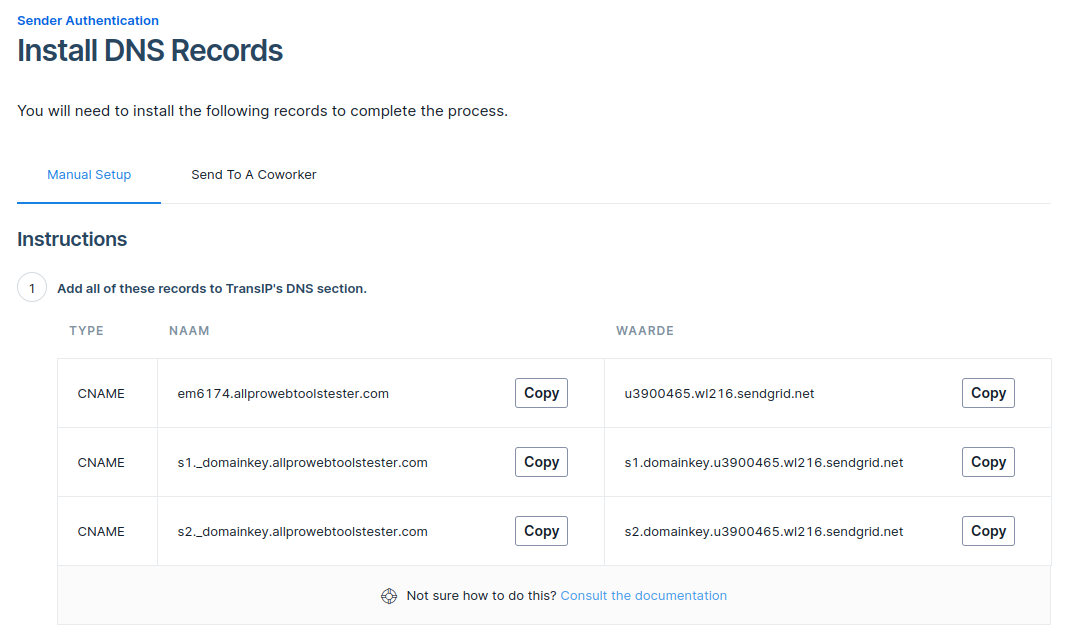
- Log into your domain hosting service website and enter these records you receive from Sendgrid. You can contact your domain hosting company for more instruction on how to add DNS records or you can also contact AllProWebTools for the support.
- Make sure you put in the correct information and save
- After DNS records has been filled in, you can come back to Sendgrid website and click the "Verify" button

- If your DNS records are put in correctly, you will see a screen just like this.

Ta-da! You can start sending out emails form your AllProWebTools console.

